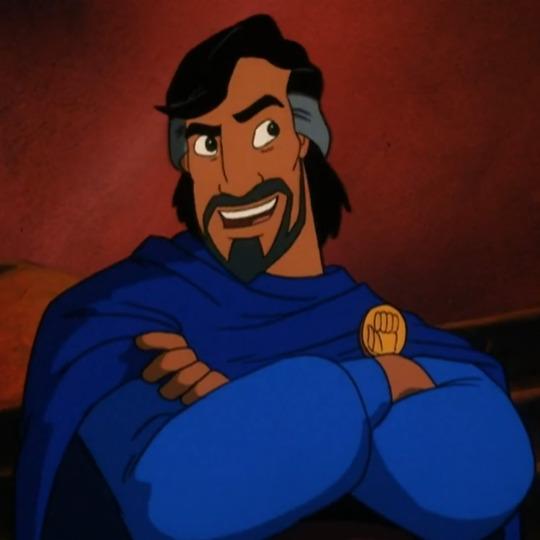
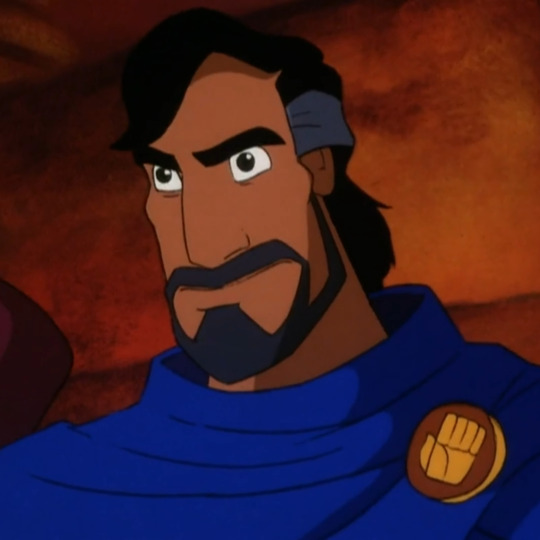
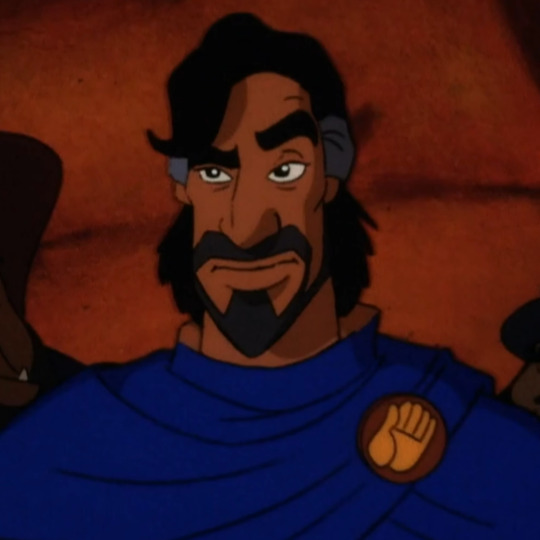
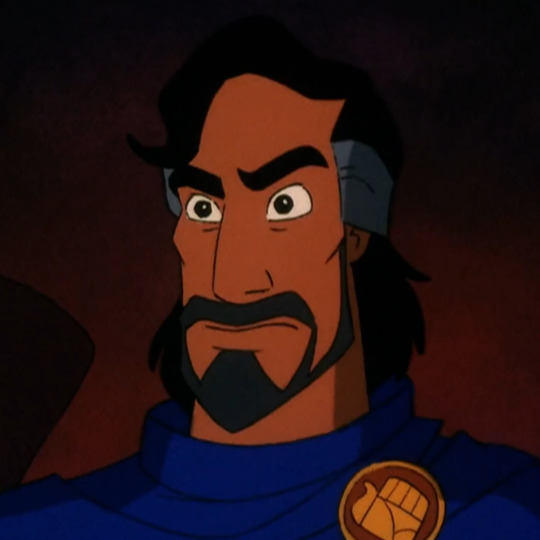
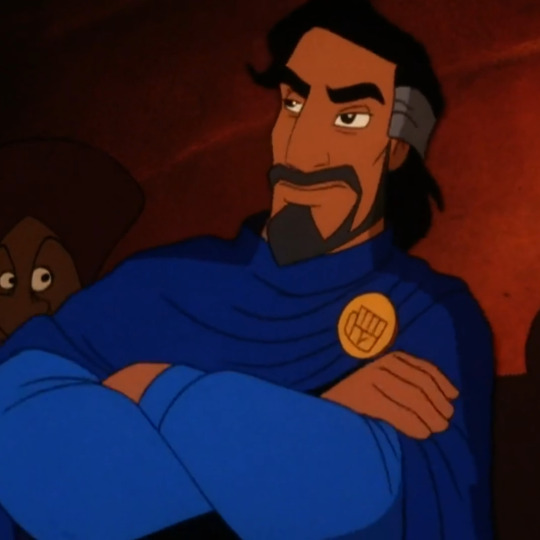
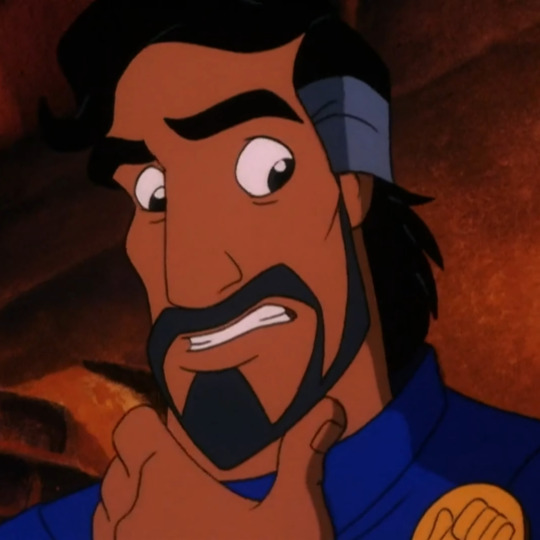
#cassim icons
Explore tagged Tumblr posts
Note
Hello! Can you make icons of Cassim from Aladdin: and the forty thieves? Thank you so much!
ㅤㅤㅤ
ㅤㅤㅤ★៹ icons + header !!
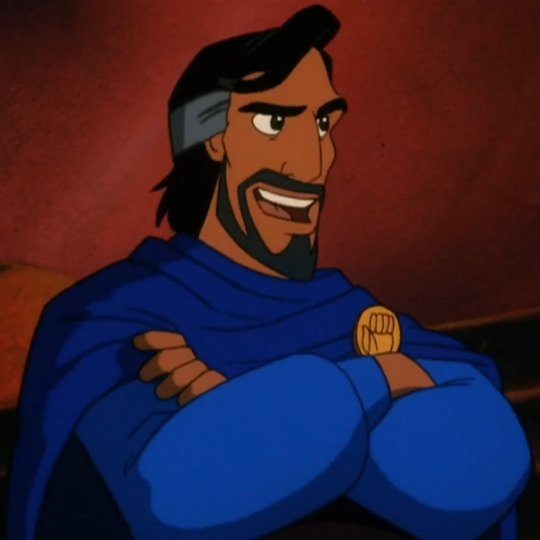
⌗ CASSIM .ᐟ
© aladdin and the king of thieves — ( 1996 )
𝗹𝗶𝗸𝗲 or 𝗿𝗲𝗽𝗼𝘀𝘁 if you want more content.
credits for the content made by me.
why not 𝗿𝗲𝗽𝗼𝘀𝘁 this? that would be great.
#cassim#aladdin#aladdin and the king of thieves#icons#cassim icons#aladdin icons#aladdin and the king of thieves icons#header#cassim header#aladdin header#aladdin and the king of thieves header#aesthetic#aesthetic icons#icons aesthetic#aesthetic header#header aesthetic
41 notes
·
View notes
Text
All characters are chosen from Disney movies that debuted in the month of August.
Due to being a bit late this month, this poll will only run for one day in order to allow the winning character adequate time as the blog's icon.
This poll will end at 8:53 PM CST August 10th.
12 notes
·
View notes
Note
Have they always had the same physical appearance, or have you had to edit how they look?
Uncommon Questions for OCs and their creators:
Oh, I had to edit how they look MANY TIMES throughout the years.
The only one who retained the same physical appearance from Day 1 is Abena as a tall, voluptuous, dark-skinned booba lady with a teeny weeny afro, hypnotic smile, and big alluring eyes. The only change I think I did since her original design was define her jawline and cheekbones, and even then that was just me being a better artist and not just drawing her as a generic anime girl with toned in skin. I guess updating her outfit and changing how she covers her hair counts.
The men, on the other hand:
Josep was initially significantly young, leaner, and had a different hairstyle (rounded hairline with bangs and a ponytail). His face was also smoother. As my art improved, he'd eventually gain the sharp cheekbones, defined jaw, and unique eyes, as well as a bulkier physique to compliment his spooky theme. It's actually fairly recently (the past few years) his hair was most defined: slicked back with a few stray strands and a widow's peak hairline with trepanning scars on his skull. The braided queue slung over the shoulder like an anime mom's side plait is perhaps the most recent change (because I'm sick of trying to decide how his hair falls over his flipped cloak collar), as well as self-flagellation scars on his back because Catholicism, yo.
Rashid also had a major change. Like Josep, he was initially younger, almost identical to Amir but with the stereotypical genie look (so a shaved head with a ponytail, smaller beard, etc). That was why Rashid's original name was "Jinni"! Then later one he was made middle-aged and thoroughly bald, with a fuller beard and body hair everywhere, and a hooded cloak. Later still changed his physique to be "strong fat" to contrast the Adonises that fill up the Devil's Eye roster lmao (others also fattened up like Robert and Isaac). His hooded cloak is also changed to a general assymetrical cloak styled after Cassim from Aladdin and the Forty Thieves. Most of the recent changes onto Rashid nowadays is just defining and redefining how I draw his face and his beard. God, his beard is hard.
Ruixiong's physical design is mostly on just his hair and face. In one of his earliest drafts, Ruixiong was originally a very disabled beggar with a shitton of congenital deformities who was approached by the Master to be made abled and beautiful… only to have half of his face burned and an eye gouged out by Sing-Lung (hence the strap of cloth under his hair in some of his icons). But this is absolutely gross writing so VERY THANKFULLY it is dropped; however, Ruixiong was without a justification as to why he often covers half of his face with his hair for a long time until recently--he just has a birthmark on his face he thinks is hideous lmao. Which I eventually adjusted too--his attitude about that birthmark evolved to something he finds ugly but also prideful over, thus his reluctance to keep it covered dropped and his full face shown more often altogether. So the peek-a-boo bangs is just stylization nowadays.
Also, the top knot. Ruixiong previously didn't have the Ming-dynasty styled top-knot. That's also a recent change to his physical appearance. Ruixiong feels weird whenever I draw him without it now.
Phoebus and Guy are a special case, and I'm lumping them together as identical twins. Initially they WEREN'T twins: Phoebus was originally 23 and Guy 21 before I decided upon making them twins and moving them to 22. They also had different hairstyles; Guy was thoroughly white with weird stylized shapes while Phoebus had the symmetrical auburn Sephiroth bangs. Upon deciding to make them identical (barring Guy's white hair at the time), I altered Guy's hair to have Phoebus' shape and Phoebus' face to be just like Guy's (Phoebus' face was originally much more significantly "generic anime bishonen").
Originally the only way you could tell them apart, besides their personalities, was their color scheme--otherwise, left uncolored, you weren't supposed to be able to tell who is who at all. But this also changed over time. Guy nowadays has muscle, and he dresses more formally or "sexily", whereas Phoebus is a skinny twig and dresses like a lazy slob. There is also Phoebus with the birthmark on his elbow as the congenital trait that distinguishes him from Guy.
Special mention goes to Guy's hair, which has gone all over the place from full white to auburn to the current auburn with a single white streak. I am contemplating one more physical change to Guy, but I am still deciding if it's a good change or not first.
Giovanni's radical design changes is mostly on his hair. He had a really stupid looking ponytail with the Idiot Hair string plus sideburns and… all over the place. Later it became a slicked back wavy shoulder-length hair but still with the Idiot Hair strand sticking out on top of his head. Then that Idiot Hair relaxed and covered his right eye for a time as I changed the hair once again to have assyemtrical parted long bangs wherein his right eyebrow tends to be covered. Finally, that Idiot Hair was dropped altogether as I gave Giovanni his trademark sideburns instead, a decision I'm glad to have because I'm so sick of his cutesy face being so bland otherwise (the sideburns make him appear more masculine without changing his face).
Giovanni's heterochromia was entirely by accident--he was originally just blue eyed. But before I boarded the plane to go to the Philippines for college, I had an unfinished drawing of Josep smacking Gio on the head for stupids, and only one eye (blue) was colored. The other (green) was colored on the plane, but it was dark and I picked up the wrong Sharpie. When the lights brightened and I saw my mistake, I decided to keep it. And that is why Gio has two differently colored eyes!
The last major change to his physical design is probably a couple years ago, regarding the massive number of scars on his body due to self-harm during psychotic episodes in the cellar.
#ew this is long I'm sorry#22 years is a long time to be writing and redefining anything a;ofihs;ofih#[About the Seven]#[Captain Josep Frascona]#[Abena Frascona]#[Rashid al-Qadar]#[Wang Ruixiong]#[Guy Duchamp]#[Phoebus Duchamp]#[Giovanni Vespucci]#religion tw#self-harm tw
4 notes
·
View notes
Text
I found all my asu icons. makes me want to actually use my rp blog for him again djflsdjhsf
2 notes
·
View notes
Photo
More character icon practice by using Cassim from the series Magi. I mainly used him to practice more for muted colors and use blue lineart.
4 notes
·
View notes
Text
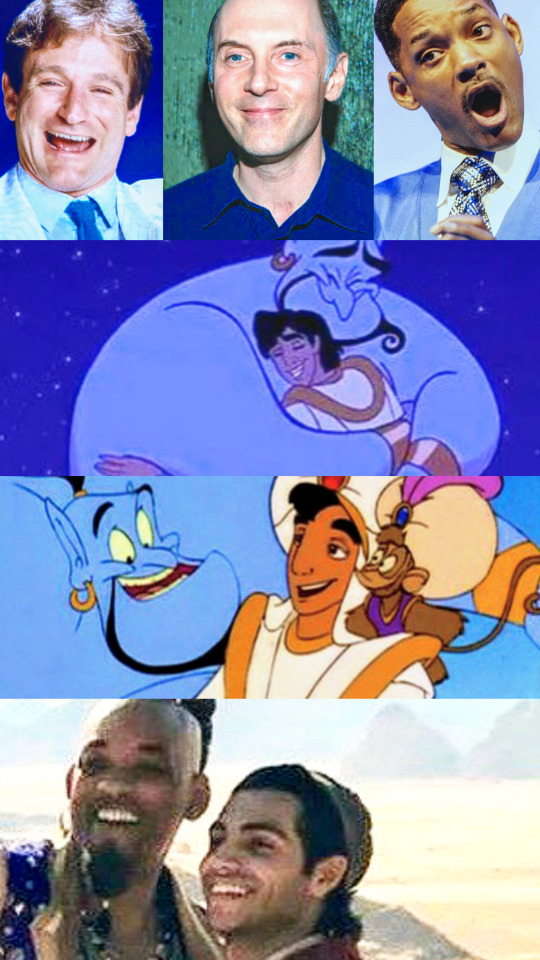
After blowing out birthday candles, I have all things genie on the brain. Keep in mind that the following write-up is not a debate of which Aladdin Genie is superior. The actors involved did their own unique versions of him, so it’s impossible to say which is better because it’s such an apples to oranges scenario. This is just a retrospective on the different characterizations of Will Smith’s live action Genie and Robin Williams/Dan Castellaneta original animated one. Yes, Dan Castellaneta. As against popular opinion as this is, Robin Williams alone is not the definitive animated Genie. He was the first voice actor and is a huge factor in the first film’s success with his very memorable performance. However, Dan Castellaneta was able to imitate Genie’s voice to the extent I didn’t know there was more than one voice actor until I was in my teens. To those of you saying you did notice, cut the crap. If you were the same age I was during the 90s, you know perfectly well that you did not notice the slight change in Genie’s voice. If you want to talk about a voice that’s irreplaceable to the Aladdin franchise, that distinction belongs to Iago’s actor, Gilbert Gottfried (notice how in Aladdin 2019, Iago almost never speaks? Yeah, like his voice or not, there’s no imitating Gottfried).
Dan Castellaneta also clocked the most hours as Genie. He portrayed him in Return of Jafar, the animated series, and in video games. He actually recorded all of the dialogue for Genie in King of Thieves, but that proved to be a complete waste of his time because Robin returned after Disney came crawling to him with apologies. Keep in mind that while the animated series was airing, Dan already had a full-time job voicing Homer Simpson and a multitude of other Simpsons characters. So, to make it easier, I’ll be referring to the animated Genie as RobDan.
Something I realized after seeing Aladdin 2019 is compared to Will Smith, RobDan’s Genie treated us kids in the audience like, well, kids. I’m not knocking him for it, but it is a strong observation. Animated Genie never ceases to remind us that he is, in fact, animated. Even when Aladdin is trying to have a serious conversation with him, RobDan Genie is constantly performing magic tricks, making pop culture references, and doing whacky shapeshifting. I’ve seen some describing him as a father figure to Aladdin, but I never once got that impression. If anything, RobDan’s genie comes off like a fun uncle and/or godfather. His only advice to Aladdin is the very generic “be yourself”. Then, when Aladdin remorsefully tells him that he can’t use his last wish to wish him free, Genie goes from congratulatory towards Aladdin for his engagement to Jasmine to being completely offended and calling Aladdin a liar. An accusation he did not make before finding out Aladdin wouldn’t be granting his wish. During the rest of the animated franchise, Genie, despite being free, always goes along with Aladdin and can come off as something of an enabler at times.
While going from animation to live action has been detrimental to most of the Disney remakes, it worked for Aladdin 2019 tremendously. The human factor and character driving is present throughout the entire film and there’s much less of an emphasis on magic. Will Smith is in his human form most of the time and it really makes him feel like his own person instead of being a mere extension of Aladdin. Unlike RobDan’s Genie, Will’s is not a benevolent being but a neutral one. Since he’s mostly dealt with power-hungry masters in the past, Genie only ever gave them what they thought they wanted without warning them of potential drawbacks. However, when he meets the very young and humbler Aladdin, Genie takes a genuine interest in him, naturally stepping into the mentor/older brother role for him. He wants Aladdin to reach his goals without sacrificing his kindness and integrity along the way. He encourages and props the insecure teen up, but is unafraid to rein Aladdin in and openly disapprove of his more questionable choices. When Aladdin initially doesn’t want to give up his last wish, Genie is disappointed but NOT for himself. He honestly sees Aladdin as his only friend and is worried the power is morally corrupting him.
However, there are definite positives to be found in the relationship between their animated counterparts. After they separate on positive terms in the first film, the now freed Genie returns to Agrabah. Even after all his globetrotting, Genie realizes that nothing the world has to offer can compare to the impish street rat he’s grown to love. Essentially, home for Genie is wherever Aladdin is. Yes, he gives into him at times he really shouldn’t, but this is due to the absolute loyalty between them. Besides Abu, Genie is the most stable, consistent part of Aladdin’s life. Even when he falls out of favor with Jasmine and the sultan, Genie sticks by him unconditionally. Aladdin also clearly trusts Genie more than anyone else and yes, this includes Jasmine. After a particularly nasty argument with the royal family, Genie is the one who goes out on a limb to help Aladdin reconcile with them. When Aladdin finds Cassim, Genie is the only one he tells about Cassim’s status as the King of Thieves. Genie has not word of negative judgement about it and continuously encourages Aladdin to have a relationship with his father, regardless of Cassim’s past. Also in the third film, Genie goes all-out to make Aladdin and Jasmine’s wedding the magical event of the century.
Personally, I do prefer Will’s Genie. Again, it’s apple and oranges. People like me appreciate the more human, suave, multi-layered Genie while others get more enjoyment out of the original sweet comic relief version. All three men portrayed Genie to the best of their abilities and all deserve appreciation and acknowledgement for breathing life into the iconic blue magic man.


#aladdin 2019#aladdin live action#aladdin genie#big brother genie#lovable street brat#platonic love#robin williams#will smith#dan castellaneta#pro dad#blue bromance#mena massoud#fanart#found family#father and son
35 notes
·
View notes
Text
U N M A S K E D (GUYS. I need to make a new theme, so bare with me for a bit on that front. However, I AM OPEN FOR WRITING. Like this post for a mini starter. Message me for longer thread plotting! Please, I don’t bite. For now, I’ll be replying to Cassim’s daughter, & working on a new theme/icons. Hit me up!)
6 notes
·
View notes
Text
general faq about Aladdin for people who haven’t seen the show
What’s wrong with your Aladdin / why do you play him so weird?
I can’t stress this enough, I write him based on the canon of once upon a time. In the show, at its core, Aladdin is written as a combination of the original character as his father, Cassim, from Aladdin and the King of Thieves. At his best, he falls into the trope of jerk with a heart of gold at his worst, he’s easily tempted by greed and survivalism into throwing the masses under the bus. They literally set up the icon shot from the movie of him giving his hard-earned food to orphans... only to show us that he takes a bite of the food in front of them and walks away. Jasmine is truly his guiding light and the only actual reason he gets a redemption arc.
What are the other notable differences between Aladdin (movie) and the associated characters/plots in ouat?
First and foremost, Aladdin can use light magic part of the reason of this is due to his fate as the Savior of Agrabah which he royally fucks up. Jasmine is the hero of her own story and ultimately the one that is tormented by Jafar, then single-handedly defeats him. Jafar, for a time, wiped Agrabah off of the map, locking it in a parallel universe. They also meet at a much later point in their lives. In accordance with the ~*~destiny~*~ of Saviors, they die brutally and tend to live short lives after fully becoming the Savior, Aladdin starts to have visions of this future (thanks for starting those on day 1, Jafar). Terrified of dying, he succumbs to Jafar’s torments and uses the shears of the three fates to sever himself from his destiny as Savior, runs away and fakes his death. When Jasmine finds him again, and Aladdin steals the lamp he chooses to bind himself as the new genie to serve Jasmine.
What does the inside of the Genie’s Lamp look like?
We get a good shot of it in the opening of this clip. You can watch that whole clip if you’d like to fast forward through the next FAQs related to magic and how it’s used in Once Upon a Time.
What are the rules for making wishes?
Feel free to ignore this if you want to write with Aladdin as a genie, because he’s bound to explain them to each and every new master. 1) you can only have three wishes and exactly three wishes 2) you cannot wish to kill someone or bring someone back from the dead 3) you cannot wish for love in any regard and, no, 4) you can't wish for more wishes. 5) You cannot undo any wish you make, no exceptions. 6) All magic comes at a price, be ready to pay it. Wishes have a way of biting the wisher in the ass. If you want an example of that watch this clip of the Genie from Aladdin using his wish to be with the Evil Queen from Snow and watch quickly it goes south. Spoilers, duh.
4 notes
·
View notes
Text
H2O DECADE 2 DECADE FESTIVAL ANNOUNCE SECOND WAVE OF PERFORMERS
Earlier this month organisers of SA’s iconic music festival H2O announced their massive 20 year anniversary celebration, H2O Decade 2 Decade Festival which will be taking place later this year.
Today organisers confirmed their second wave of performers which includes international headliner Justin Martin alongside some of SA’s hottest DJ’s Kyle Cassim, Dean Fuel, Pascal & Pearce, Chrizz Beatz,…
View On WordPress
0 notes
Text
CELEBRATING 20 YEARS OF H2O AT DECADE TO DECADE FESTIVAL
South Africa’s iconic music festival turns 20 this year and organisers today officially announced taking two decades of their magical years of H2O parties and creating one unforgettable event, later this year.
February 1999 saw the birth of the H2O Party brand. Since its inception 20 years ago, South Africa’s iconic daytime to night time dance music festival has grown in size and stature to boast attendance in excess of 10 000 electronic dance enthusiasts at every H2O party.
H2O has hosted some of the world’s finest DJs and dance acts including Deadmau5, Steve Aoki, Swedish House Mafia, BLACK COFFEE, Gareth Emery, Dash Berlin, Fatboy Slim, Paul van Dyk, Sister Bliss, Bob Sinclar, Technasia, Dyro, Hardwell, Nicky Romero, DJ Jean, Judge Jules, Cosmic Gate, Randy Katana, Steve Hill, Kid Creme & Junior Jack, Chris Lake, Oscar G, Hoxton Whores, Kid Massive, Major Lazer, Juicy M, Sunnery James & Ryan Marciano, Tony Cha Cha to name a few!
And with what promises the event of the year in 2019, the first wave of confirmed international acts include superstar German DJ Duo COSMIC GATE, Ukranian sweetheart JUICY M and the legendary Dutch sensation TONY CHA CHA.
These international headliners together with 50 of SA’s hottest artists in the dance music movement will play across 6 dance floors. Confirmed so far are the legendary Goldfish ,hip hop royalty Nasty C, Timo ODV, heavy hitter DJ Fresh, Kyle Cassim, Vimo, Vin Deysel, Mark Stent, Abby Nurock, Ricardo da Costa and Chunda Munki.
This slideshow requires JavaScript.
Known for spectacular lighting & laser shows, mind blowing staging & world class sound rigs, in addition to the top class production, the story about to unfold this September can’t be explained but experienced. Each of the showcasing acts will offer a unique sound and energy catering for all dance music lovers and H2O fans over the past two decades alike. The two decade H20 musical journey will be narrated across 6 dance arena’s and will feature various different types of dance music to cater for two generations of fans.
Hosted and presented by founders Dave Forbes and Itsik Bouhbot alongside Anthony Forbes and Ricardo da Costa, all of whom pioneered and changed the face of the South African dance scene for the past 20 years, this celebration will take place at the well-known, well-loved party indoor/ outdoor venue Wild Waters in Ekurhuleni this September.
H2O Decade 2 Decade will also pay homage to one of the late founding members Paul Forbes who passed away last year.
H2O co-founder Itsik Bouhbot today commented: “Doing this for 20 years obviously has a story behind it and we’ve got one insane one to tell, that’s for sure! Memories, moments, magic and some of the best times of our lives! This event is going to encapsulate 20 years of party history, nostalgia, 20 years of dance, this will for sure be one of our most special events, it’s definitely not one to miss!”
The special anniversary ticket launches today at a special discounted birthday rate from Howler https://h2o.howler.co.za/
Catch the ticket wave now, it’s rolling in fast!
IMPORTANT INFORMATION
H2O Decade 2 Decade
Date: Saturday 28 September 2019
Venue: Wild Waters, Boksburg
Starts: 12 pm
Special Anniversary Tickets (Available 2-9 May only):
General access tickets R150
VIP R250
V-VIP tickets R1250
Please Facebook link for more info: https://www.facebook.com/events/276857736531066/permalink/278721119678061/
H20 TURNS 20 CELEBRATING 20 YEARS OF H2O AT DECADE TO DECADE FESTIVAL South Africa's iconic music festival turns 20 this year and organisers today officially announced taking two decades of their magical years of H2O parties and creating one unforgettable event, later this year.
0 notes
Text
Waxworks – Walk Like an Egyptian
By Deimar
Prince Cassim’s Journal: For Hathor I will have my revenge against my brother. He pledged allegiance to the God of Death, Anubis, bringing shame to our family. He even had the audacity of becoming the High Priest and constructed a pyramid in my territories. But worst of all, he has just kidnapped my beloved princess. What’s her name? At the verge of our wedding! We have to find him and kill him. It can only be us, so said uncle Boris. Wait a second, who is Boris?
The people have spoken and so I listen. And the people have decided a very weird order for my playthrough. But I am getting ahead of myself. Our first stop through history begins with the original twins, the Egyptian High Priest of Anubis and prince Cassim of… Egypt? My guess is as good as yours.
Where is Brendan Fraser when you need him?
This waxwork runs entirely inside a pyramid full of traps and cunning puzzles. Or at least that what my travel agent told me before kicking me inside. The pyramid is composed by six increasingly smaller levels that we must climb to reach the chamber at the top in order to rescue the princess and kill our brother. Not necessarily in that order.
The six levels have a moderate amount of traps and combat, enough to not be very boring and not too much to be bothersome. The only thing is that traps make backtracking somewhat annoying. If you recall the catacombs in Elvira 2, there was a wire-based trap that you could avoid by clicking on the wire and selecting avoid in the menu. You had to do it every time you want to traverse a passage with a wire and be very careful, as failing to do that means death. Well, it seems like no one realized how annoying is to travel a dungeon full of those traps and they are back. Yay!
Another very common type of trap are pressure plates that free boulders. You can’t avoid stepping on the plate, so you have to outrun the boulder and step out its path. Those two are the most common traps through the pyramid, but there are special rooms with their own unique traps that are a tad more interesting, but we will talk about them when we explore the pyramid.
Level 1
When we step into the waxwork, we are left helpless inside the pyramid as a stone wall rises behind us blocking the entrance. Sandy brown everywhere. Not the most interesting visuals to be honest. Advancing through the tunnel we can soon reach what seems the office of an architect. Someone was not very happy about his work, because the architect sits right at his desk with a dagger in his back. Our first weapon.
I love that when examining the body the description says that he has an ugly dagger wound in the back and he MAY be dead. Just may…
Inside the office I found a weight inside a pot, some blank papyrus, ink, an oil burning lamp, several jugs and pots, an amulet with a beetle drawing on it and the corner of a burned papyrus, showing a map with some stairs and columns. Closer examination of the architect also showed another papyrus under his body that contained a drawing of anubis with nine symbols.
Here I started to notice that the interface and the overall design are not very user friendly. For starters, you can’t drop anything. I took a basket and a carpet just to see if they might have been hiding something, but then I could not drop them. It is not very annoying, but I can see how you could end up with a lot of trash in the inventory and no way of organizing it, because you can take almost anything here. But that is a problem, as you have to look inside every single pot in the room, and there are quite a few. As they are containers, if you take them and accidentally drop something over them, the item will be stored. It is very easy to lose track of items this way. It actually happened to me with the brooch. There doesn’t seem to be an inventory limit at least.
Anyway, soon after leaving the architect’s office we meet our first encounter. A soldier carrying a sword. Combat in this game is very straight forward. We have to click on the two swords icon on the right and the cursor becomes a sword. Clicking on the left of the screen makes our character slash from left to right. Click on the right side does the opposite movement. And clicking on the middle allows us to thrust our weapon. I was not able to notice any major differences between the three attacks. My intuition tells me that thrusting does more damage, and it might be possible that hitting the weapon carrying arm of the enemy from the sides makes them hit for less damage. But none of that is a problem, as usually thrusting a few hits usually kills enemies very fast, especially after getting a lance from one of the soldiers in this level. So, combat is not very interesting, just a clicking fest as soon as you see the enemy. And no respawns, which is also welcomed.
I never thought I would miss Elvira 1 combat. At least this doesn’t get in the way I guess
There are also some statues decorating the pyramid that can contain pots with some items. Usual items are weights and tuning forks. Yep, tuning forks. If you are puzzled by this you didn’t play Elvira 2 or read through my playthrough, shame on you. There are some glass walls in the pyramid that can only be broken by using a specific tuning fork. For example the glass wall in this very level.
Another common element found in the pyramid are beams. These beams, or props as the game calls them, hold the ceiling of the pyramid. The idea is that you can knock them down and a stone wall from the upper level will fall. This frees the way in the upper level and it is usually safe to knock them down as soon as you see them as there is always a way around. The only problem is that we can’t do that right now, as it seem like we don’t have the necessary strength. More on that later.
If we continue exploring the pyramid, we can find some sand piles that we can take, another enemy in the form of a priest that is not very difficult to beat and a water-filled room. Looking into the water it seems like there is a large creature lurking below, but there is nothing we can do at the moment. Well, we can try to collect water from there, but as that ends up in our death, we can’t do anything productive. There is a treasure room nearby, but the only thing of interest are more pots, another weight and a tile with a hieroglyph.
Level 2
As soon as we reach the top of the stairs from level 1 we are greeted with a lethal puzzle. One that made me question if I was the one playing The Island of Dr. Brain. We are given two minutes to solve this:
I would have preferred some flamingos
To be honest, at first I was a bit puzzled about what to do so I decided to make use of the in game hint system in the form of old uncle Boris. Clicking on the crystal ball icon on the left puts you in contact with the realm beyond and we can ask uncle Boris some things. The interface for conversation is based on dialogue trees à la LucasArts but with some of the questions costing psychical energy (PSY in the status bar). So we can get answers to where is the princess and what this Anubis sect nonsense is all about for free, but asking about specific puzzles, like for example this one or how to kill the alligator in the pool, or asking for healing costs some points. A very small amount, so it was never an issue to contact Boris.
As I was already there, apart from getting a clue for this puzzle and the next I decided to try the heal option, which transforms all papyrus in healing scrolls, each one healing for 10 HP. I only had four papyrus, meaning I could only recover 40 HP, not even enough to top me up at that moment, so I decided to apply save scumming to combat, as a well placed hit with the spear can in one or two hit an enemy, saving precious HP. You level up quite a few times before reaching this level. In fact, in level one you level up after every single enemy and after breaking the glass wall. The only thing I noticed changing was that my HP was getting higher but even then I didn’t want the risk of reaching a point I was unable to continue due to lack of HP.
So, what’s your plan after we defeat the witch? Should we put the crystal ball in family dinners?
In any case, going back to the puzzle at hand, this is a magic square type of puzzle, but with a pentagram instead of a square. I will let you get the answer yourselves. Because maybe I am the evil twin. MUHAHAHAHAHA!… HA!
Once that is solved, exploration of level 2 is not very different from the first level. In fact, there are very few distinguishing things in the whole pyramid. This level introduces us to the pressure plates with boulders and the knockdown of beams. The first one is quite straightforward, as there are visible floor plates that when stepped on produce a sound and a boulder will soon come crashing everything in its path. Avoiding these is easy, as you only need to search for a side passage to hide but being careful, as boulders tend to do curves. For example, the boulder coming south from K4 will not stop until reaching M11. And the boulder will stay there, so it may block some paths.
We already commented on beams in level 1, but it is here on level 2 where we find a hammer in the statue of a slave boy at N4 that allows us to knock them down. Otherways, the whole south section of the level stays blocked by a wall at X11. So once you get the hammer you have to run back to level one to knockdown the beam, which blocks X11 at level 1 but opens the square at level 2.
Speaking of backtracking, the red square in the map is a pool of burning coal that we can not jump over. Exploration of this level produced another weight, another tuning fork and a pot full of entrails. This one can be used to lure the alligator out of the pool and kill it by throwing a spear. Sounds easy, but the problem is that there is no apparent way of throwing the spear. You have to start a combat and by trying to attack, our character will throw the spear instead, killing the alligator instantaneously
.
It took me a couple of tries. Fighting the interface is not a feature the game should be proud of
With the alligator dead we can fill one of the numerous pots with water to extinguish the fire at level 2. Do you think it would be that easy? Of course not, because one is not enough. Nor two. Nor three. The number is five, if you were wondering, which made me lose a lot of time searching nearby statues and the treasure room for pots to fill with water and going back and forth to the fire until I managed to completely extinguish the fire. And my only question to that is why. Why make your players come and go from one level to another filling pots with water until the fire is extinguished? This is just adding more hours of gameplay by torturing the player. Did I mention that you have to click on the wires and select “Avoid” to not die every time you pass by one of those traps?
After getting pass by the burning coal, the only thing of interest is another tile found lying in the ground. Taking it is a bit difficult due to the interface. You can move by clicking on the arrows/compass on the left of the screen, by using the keyboard arrows or by clicking in the edge of the gameplay screen. But the tile sits right at the edge, so there are only a few pixels where you can get ahold of it.
Level 3
Once again we have a deadly problem as soon as we get to level 3. This time, the puzzle is quite simple. You have a set of pipes linked together with some switches that make the water go one way or another. At the end of the pipes there are six bottles, one with the symbol of Anubis and the other 5 a cobra. The goal is to set up the switches so that the bottle with the symbol of Anubis is filled before the other ones. Quite a nice and simple puzzle. Even the position of the good jar is randomized every time.
I really hope we don’t get a “Your princess is in another pyramid” after becoming a plumber
After solving the puzzle, we are given access to level 3. This level complicates matters with glass walls by having you need a specific tuning fork for each wall. So basically, every tuning fork is the equivalent of a key to a door. Of the three glass walls here, only the first one can be broken with the forks we are carrying, while the other two need a fork from level 4, which means knocking down the beam here could be a death end, as you need the sand from level one to continue.
And what do you need the sand for? Well, there is a passage going south with a hanging pot in the middle and a Carving at the end of it. The carving is not very interesting but the pot is. It is tied by rope to a hole in the ceiling. At first I didn’t have any idea on how to continue but after striking the pot and seeing the rope disappear once it didn’t hold any weight gave me the idea of using the sand on the pot. And voila, that makes the carving disappear to show access to another part of the level. The only problem? The pot is cracked, which seemed to suggest that there was a timer on how long would the passage be open. For your peace of mind, you should know that there is no such a limit, but thinking there was kept me in my toes in this section.
It is nice that you can destroy the pot and see the rope disappear. It is a clue that could lead to a dead end but it is nice that you can do other things with puzzle items
The only other thing worth mentioning here is that there is a room with a pressure plate. Instead of releasing a boulder, this one makes one of the statues of an archer in the room shoot at you, killing you instantly. The trick here is that there is a rock nearby that can be used to activate the trap and then we can go inside the room and take a bow and arrow from there.
Level 4
No more puzzles when arriving a level here, but this level is quite more interesting than the other ones. The first thing of notice is the large chasm, black squares, in the middle of the level. When we reach there, we can see a chasm and some kind of pillar at the other end described as a stone needle, but no apparent way of crossing the chasm. It is nice that the underlying levels have nothing on those squares, so you don’t feel cheated with the map design.
This level is so Last Crusade that this might have been a leap of faith
Going the only way available, for which it is mandatory to have knocked down the beam downstairs blocking you from the rest of the pyramid temporarily, you get access to a new tuning fork that can be used to break the two remaining glass walls below. Which produces another tuning fork. God dammit.
So the only option with the needle that made sense to me was shooting the arrow, which made the needle fall and serve as a bridge. OK. At this point one would start to think that these cultist have a very rough day-to-day operation, having to continuously replace glass walls, shoot arrows to get access to the main temple…
After the chasm, we get another glass wall that we can break with one of the forks, another beam and the puzzle of the “Word of God” from the Last Crusade. You know, the one where Indy has to step on the letters of the word Jehovah in order to cross a trap room. Here is the same deal, but the letters are replaced by hieroglyphics. The goal is not to step on those associated with Anubis. Why would the cultist test your knowledge of all things not Anubis is beyond me, but the trick here is to pick symbols that do not appear in the papyrus we took from the architect at level 1.
And if you have to come back this way you need to solve the puzzle every time. Isn’t it fun?
Level 5
Level 5 starts with a very deadly trap. Once you enter the square hall at U8, a wall blocks your way back to the stairs and the passage starts to fill with poisonous gas. After several tries and not knowing what to do, I contacted Boris who told me to watch out for things in the floor and walls. Thanks for nothing I guess. There is a mirror in one of the walls but you won’t see it while navigating the hall. You have to turn on every single square and look at each wall, making this one a very annoying puzzle, because the gas starts to block your vision very soon.
We don’t look that different from a common soldier to be honest
Anyway, we have some experience on how to treat glass in this game, so it is not a problem for our collection of tuning forks. Afterwards, we find a passage with a dead artist, our twin brother doesn’t seem too kind on his employees, under a mural dedicated to Hathor, with a depiction of the deity’s name. The artist has another brooch with a beetle that he obviously is not going to need anymore.
Forward ahead we reach the end of the passage, a room with several not very inspiring murals. But we can tap each of them and the one to the south produces a hollow sound, which suggest something behind. To open the way, we have to attack the wall, which again doesn’t seem to be very in line with how to use objects in this game. This leads to a room full of carvings of snakes in the wall and a lot of holes. Trying to look at the holes suggest that there must be a lot of mot******ing snakes in this mot*****ing pyramid.
There is a tile in the ground, but trying to take it ends up in… a crash. Yes, the game crashes. Every single time you try to take the tile. I felt a desperation at this point thinking I wouldn’t be able to complete the game that I was at the point of writing a “Lost” post, which I am sure is a record for a main game. Lucky for me, people at the GOG forum had also found the bug and why it happens. There is a pot full of oil at the beginning of the game, at the architect’s office. Either I didn’t notice it or didn’t think it was important. That pot is the solution to this chamber but the game doesn’t know what to do if you try to take the tile and don’t have the pot with you. I would fire that programmer to be honest, because that some shitty code.
I would like to think that cobra is the programmer responsible for this
So I went all the way down, took the oil and went back there, dying a few times in the wire traps along the way, and with the pot in my possession now I could take the tile. And die. You have to drop the pot first, which breaks it and extends oil all around the place, light it, hope to not die in the fire and take the tile. Aaaaaaaaaand find another bug. When you take these tiles, they can simply disappear in your inventory. Not hide in a container as I suggested at the beginning. No, they simply disappear. Great.
One reload later I was capable to taking the tile with me, but I was blocked with no way ahead. I went back to the artist and the mural of Hathor could also be tapped and broken, showing the way to level 6. Yes, the map there looks weird, but I am pretty sure that’s because the chasm and the Word of God puzzle are not exactly 3 and 2 squares.
Level 6
Reaching level 6 puts us in front of a mural dedicated to Hathor with a hole for four tiles. In the mural bellow there is a box with the name of the deity, and we have four tiles with the same drawings in them, so it is a matter of putting them in place in the correct order. Take into account that we destroyed the mural to get here, so I should thank that I was blogging the game because otherwise I might not have had an screenshot of the mural.
I sincerely hope you have a good memory if you didn’t take a picture of the mural
The final level is quite straightforward. There are two treasure rooms with more weights and a room with a scale and a sarcophagus. The sarcophagus can be opened by inserting one of the brooch in the conveniently beetle shaped hole, which reveals the princess inside. She is quite eager to join us to escape this nightmare.
Even the princess looks like Cassim. I am starting to think this guy became obsessed with himself and imagined the evil twin story while going on a murderous rampage
The scale puzzle is as basic as it gets. You have six weights, the last one can be found inside the sarcophagus after the princess joins us, and you have to balance the scale. I started to put weights in every plate and got it even as soon as I put all six of them on my first try just by trying to compensate the scale with every weight. It was just luck, as every weight has a different… well… weight and you have to take some attention to what you put in each plate. Getting a perfect balance opens up a passage next to the sarcophagus which leads to a very anticlimactic fight with our brother. He fell after two hits of my trusty spear. These twins maybe super evil but not very resilient.
Hello brother. Goodbye brother.
Behind him, a gigantic statue of Anubis with a woman shaped figure at its feet. We can climb the statue to find a brooch shaped hole that once filled with the other brooch allows us to push the woman figure and escape the pyramid. Happy ending?
Why didn’t we use this entrance?
Back to the waxwork
And so, Cassim lived happy ever after. In my introduction to the game I forgot to mention this fellow:
Basically, uncle Fester if played by 80’s Arnold Schwarzenegger
He is Boris’ butler and he is in charge of asking us for the pirate protection code, which the GOG version has limited to always being the same number, and showing us to the waxwork. I didn’t mention him because even in spite of his creepiness I thought it completely inconsequential. That is, until I got back from the pyramid. Then he starts to follow me around pushing me to other waxworks. I am sensing some evil here…
DEATH BONUS ROUND (TOTAL DEATHS: 11)
It just occurred to me that I haven’t explained what I mean by unique death: those that have a unique final death image. For example, it is the same final image with spikes dying by the second level pentagram puzzle, the third level bottles puzzle or the Word of God puzzle, so all of those only count as one.
Session Time: 4h 25 m Total Time: 4h 25 m
Note Regarding Spoilers and Companion Assist Points: There’s a set of rules regarding spoilers and companion assist points. Please read it here before making any comments that could be considered a spoiler in any way. The short of it is that no points will be given for hints or spoilers given in advance of me requiring one. Please…try not to spoil any part of the game for me…unless I really obviously need the help…or I specifically request assistance. In this instance, I’ve not made any requests for assistance. Thanks!
source http://reposts.ciathyza.com/waxworks-walk-like-an-egyptian/
0 notes
Text
MASKLESS ( in order to have my rp accounts open at once, I have multiple google accounts opened on different windows. I have icons set for each character to tell them apart quicker. Y'ALL, I CHOSE A VINYL RECORD FOR CASSIM CUZ HE’S OLD LOLOLOL. )
1 note
·
View note
Text
watch me download my cassim icons even tho i have no use for them bc no one rps with me and i deleted all my rp blogs
0 notes
Text
I have a fuck ton of Cassim icons from when I used to actually rp as Asu lmao.
0 notes